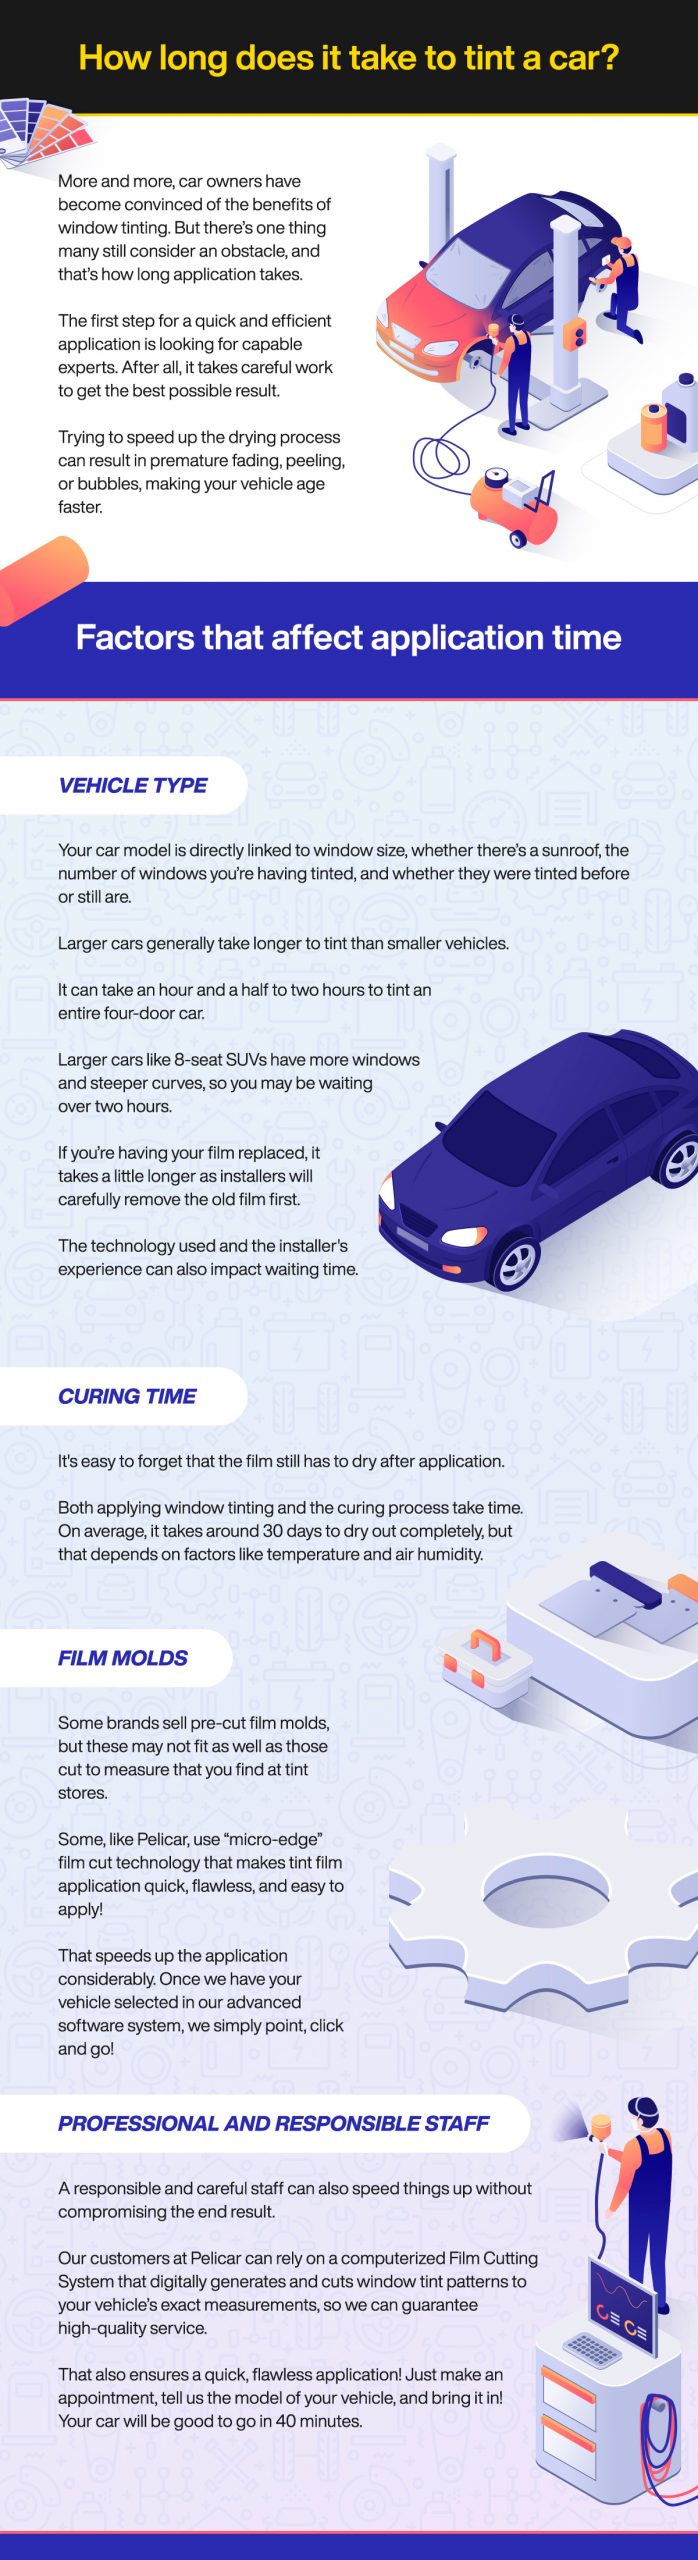
Tinting a car typically takes about two to four hours. Factors such as vehicle size and window complexity can influence the duration.
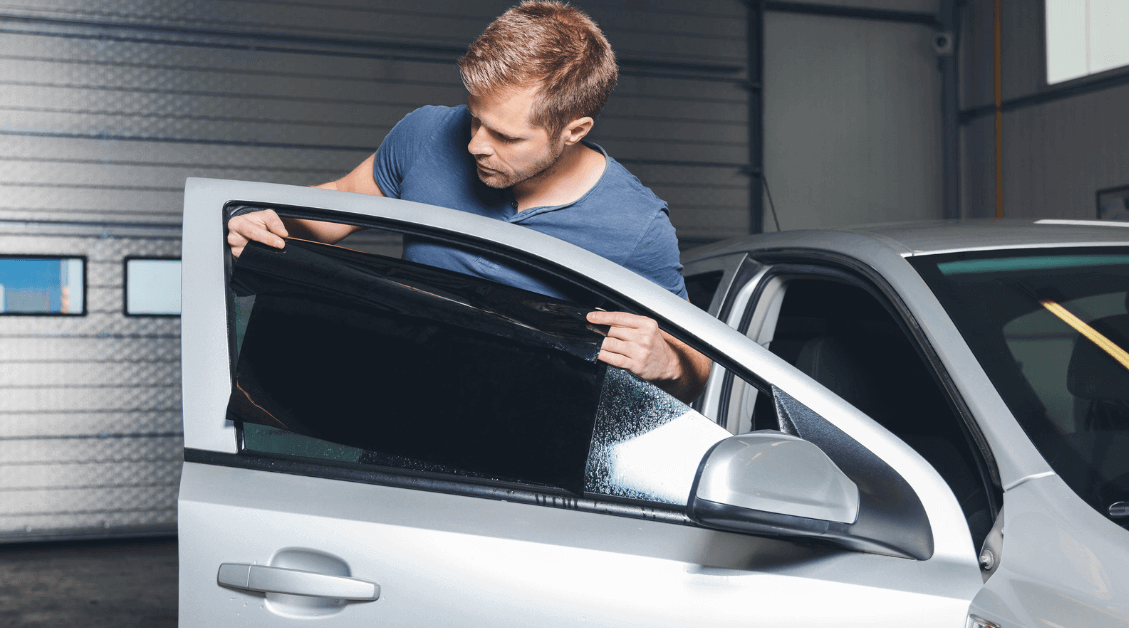
Tinting your car windows isn’t just about aesthetics; it’s a practical upgrade that provides privacy, UV protection, and temperature control. As a car owner, deciding to tint your vehicle is an investment in comfort and safety. The process involves applying a thin laminate film to the interior of a car’s windows.
Skilled technicians can complete this task with precision and speed, ensuring a bubble-free finish. The time required for this service can vary, with standard sedans often taking less time than larger SUVs or trucks with more intricate window shapes.
Before scheduling an appointment, it’s essential to understand that the time needed for a quality tint job can be affected by the type of tint film chosen and the current condition of the windows. A professional installer can provide a more accurate time estimate for your specific vehicle.

Credit: www.solarwaveswindowtinting.com
Car Tinting
Car tinting is a process that adds a thin film to a vehicle’s windows. This film can protect, enhance privacy, and improve the look of a car. Professional installation ensures quality and durability. The time it takes to tint a car varies based on several factors.
Benefits Of Tinting Your Car
- UV Protection: Tinting blocks harmful sun rays, protecting skin and eyes.
- Interior Preservation: It helps prevent fading and cracking of the car’s interior.
- Improved Privacy: Darker windows keep prying eyes away from the vehicle’s occupants and belongings.
- Temperature Control: Tinted windows can keep a car cooler on sunny days.
- Enhanced Safety: The film can hold shattered glass together in an accident.
Factors That Influence Tinting Time
| Factor | Impact on Time |
|---|---|
| Vehicle Size | Larger vehicles take more time to tint. |
| Window Shape | Complex shapes require more time for precise application. |
| Type of Tint | Some tints need careful handling and take longer to apply. |
| Number of Windows | More windows increase the overall tinting time. |
| Weather Conditions | High humidity or low temperatures can extend drying times. |
| Installer Experience | Skilled technicians can work faster and more efficiently. |
Tinting Process Explained
Understanding the steps to tint a car ensures a smooth and satisfying upgrade to your vehicle. Let’s dive into the detailed process, from selecting the right material to the final touches of installation.
Selecting The Tint Material
Choosing the right tint for your car is crucial. The best tint blocks harmful UV rays, reduces heat, and enhances privacy. Options vary in quality, durability, and price. Popular types include dyed, metalized, hybrid, carbon, and ceramic tints.
- Dyed Tint: Affordable and blocks light rays.
- Metalized Tint: Reflects heat using metallic particles.
- Hybrid Tint: Combines dye and metal for better performance.
- Carbon Tint: Offers UV protection and doesn’t fade.
- Ceramic Tint: Top tier in heat rejection and clarity.
Preparation Before Tinting
Proper preparation ensures a flawless tint job. Clean windows are essential. The vehicle’s interior should be free of dust and debris. This step prevents imperfections and ensures tint adhesion.
| Step | Action |
|---|---|
| 1 | Clean windows inside and out. |
| 2 | Remove any stickers or adhesives. |
| 3 | Use a lint-free cloth for a final wipe. |
| 4 | Ensure a dust-free environment. |
Once the windows are prepped, the tint film is carefully applied, smoothed out, and trimmed for a perfect fit. Curing time varies, but it’s vital to allow the tint to set without disturbance.
Average Time For Tinting
Deciding to tint your car windows is the first step. The next question often is: How long will it take? The answer isn’t one-size-fits-all. The average time for tinting a standard car ranges from two to four hours. But factors like car model and window shape can change this.
Time Estimates For Different Car Models
Not all cars are the same. A compact car may need less time than a large SUV. Below is a general guide:
- Compact Cars: Approx 2 hours
- Sedans: Approx 2-3 hours
- SUVs and Vans: Approx 3-4 hours
Remember, these are just estimates. Your car’s specific needs could mean more or less time.
Why Time Can Vary
Different factors affect the time it takes to tint a car. Let’s explore:
| Factor | How It Affects Time |
|---|---|
| Window Size | Larger windows can mean longer times. |
| Window Shape | Complex shapes need more work and time. |
| Number of Windows | More windows increase overall time. |
| Old Tint Removal | Removing old tint can add hours to the job. |
| Type of Tint | Certain tints require more precision and care. |
| Installer Experience | Experts might work faster than beginners. |
Quality should be your priority. Rushed jobs can lead to bubbles and peeling. Trust a professional for the best results.
Professional Vs. Diy Tinting
Deciding between Professional vs. DIY Tinting for your car can be tricky. Each option has its unique set of benefits and challenges.
Pros And Cons Of Professional Services
Choosing professional tinting services offers several advantages:
- Expertise: Professionals have the skills for a flawless finish.
- Warranty: Most services come with a warranty.
- Material Quality: High-quality materials are used.
Yet, there are some downsides:
- Cost: It’s generally more expensive than DIY.
- Appointment: You need to schedule a time.
Time Investment In Diy Tinting
DIY tinting can be a rewarding project. Here’s what it involves:
- Time: It can take a few hours to a whole day.
- Learning Curve: You may need time to learn the process.
- Tools: You’ll need specific tools and materials.
Although it requires more of your time, DIY tinting can be less costly and offers personal satisfaction once completed.
Pre-tinting Considerations
Before diving into the tinting process, key considerations set the stage for a smooth upgrade. Understanding legalities and choosing the correct tint percentage are vital steps. These ensure a seamless experience that meets legal standards and personal preferences.
Legal Restrictions And Compliance
Every region has specific laws governing car tinting. It’s essential to know these rules. Non-compliance can lead to fines or removal orders. Most areas have restrictions on how dark tints can be. They often measure this in Visible Light Transmission (VLT) percentages.
The front, back, and rear windows may have different VLT limits. Checking with local DMV or law enforcement ensures legal compliance. An experienced tinting professional can also guide you on these regulations.
Choosing The Right Tint Percentage
Selecting a tint percentage is more than just a style choice. It impacts visibility, heat rejection, and UV protection. The lower the VLT percentage, the darker the tint. While a dark tint may look sleek, it might not be practical for night driving. Balance aesthetics with functionality is crucial. A table can help visualize common tint percentages and their benefits:
| VLT Percentage | Visibility | Heat Rejection | UV Protection |
|---|---|---|---|
| 70% | Excellent | Good | High |
| 50% | Good | Very Good | Very High |
| 35% | Reduced | Great | Excellent |
| 20% | Low | Excellent | Superior |
| 5% | Very Low | Maximum | Maximum |
Consider your daily driving conditions and personal preferences when choosing. Consult with a tinting professional to find the best match. They can demonstrate how different tints look and perform. Their expertise ensures a choice that satisfies both style and practical needs.
Step-by-step Tinting Procedure
Tinting your car windows does more than just enhance its appearance. It provides privacy, shields from UV rays, and reduces glare. But how is it done? Follow this detailed, step-by-step guide on the tinting process for a professional finish.
Cleaning And Preparing Windows
Start with a spotless surface for the best results. Any dirt or residue can affect the tint’s adherence and longevity. Here’s how to prepare your windows:
- Use soapy water to wash the glass.
- Scrape off any adhesive or residue.
- Rinse thoroughly to remove soap and debris.
- Dry with lint-free towels for a spotless finish.
- Cut the film to the window’s shape, allowing extra edges.
Application And Smoothing Techniques
The application is crucial. Bubbles or wrinkles can ruin the tint. Use these techniques for a smooth finish:
- Peel the film’s backing slowly.
- Apply the adhesive side to the inside of the window.
- Start from the bottom, moving upwards.
- Smooth out the film with a squeegee.
- Push bubbles to the edges, expelling trapped air.
- Trim excess film for a perfect edge.
Remember, patience is key. Rushing can lead to mistakes. Allow time for drying. Check local laws to ensure your tint meets regulations. With these steps, you’ll achieve a sleek, professional look.
Post-tinting Care
Post-Tinting Care is crucial for ensuring your new window tint lasts long and looks great. Proper care starts right after the installation. Follow these guidelines to protect your investment.
Curing Time For Tint
After applying tint to your car’s windows, the film needs time to dry. This period is known as curing time. Curing time can vary based on weather conditions and the type of tint used. Typically, it ranges from a few days to a few weeks.
- In sunny weather, curing may take about 3 to 5 days.
- In colder weather, expect it to take up to a few weeks.
During this time, avoid rolling down your windows. This helps the tint set without interference.
Maintenance Tips To Prolong Tint Life
Maintaining your car’s tint is simple but important. Here are some tips to keep your tint looking new:
- Avoid harsh cleaners: Use soapy water and a soft cloth.
- Keep sharp objects away: These can scratch or peel the tint.
- Wait to clean: After tinting, wait a week before cleaning windows.
Following these steps will help maintain the tint’s appearance and effectiveness.
Credit: pelicarwindowtinting.com
Troubleshooting Common Issues
After tinting your car, certain issues may arise. Knowing how to handle them saves time and money. Let’s address the common problems and their fixes.
Dealing With Bubbles And Peeling
Bubbles and peeling can be a nuisance. They often occur after a recent tint job. Don’t worry, they can be fixed.
- Small Bubbles: Often, these disappear within a few days. Wait a week before taking action.
- Large Bubbles: Use a heat gun or hairdryer on a low setting. Gently warm the area and press the bubble out towards the edge.
- Peeling: This might happen at the edges. Carefully apply heat and smooth down the corners with a microfiber cloth.
Remember, do not push too hard. This could damage the tint further. Use gentle motions.
When To Seek Professional Help
Sometimes, DIY fixes are not enough. Professional help is needed when:
- The tint doesn’t adhere even after you apply heat.
- Bubbles reappear constantly or increase in size.
- Peeling becomes widespread and is not limited to edges.
Experts have the right tools and experience. They can ensure a flawless finish. Choose a reputable service for the best results.
Conclusion
Tinting your car varies in time based on a few factors. Whether you choose professional service or DIY, expect it to take anywhere from two to four hours. Remember, the quality of the materials and the complexity of your vehicle will influence the duration.
Leave a Reply